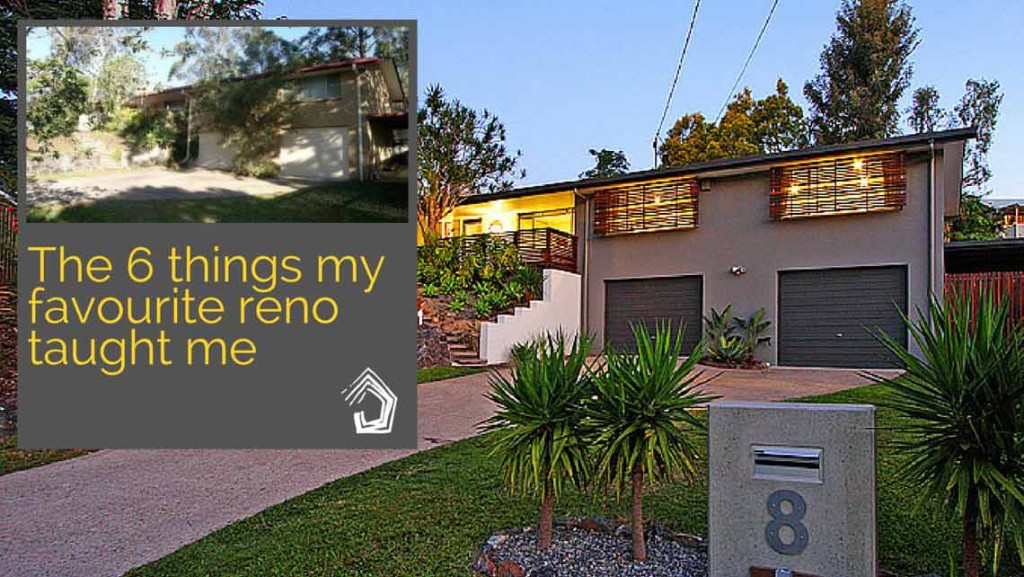
Each time you renovate, you learn something new! Here’s 6 renovation lessons from my favourite project – transforming a 1960’s brick home.
Introduction
Buying our second home came as a bit of a surprise. We were nearing the end of renovating our first home, and our first child was 3 months old. I dropped my hubby off at work one Saturday morning, bought the paper and checked out the real estate section. It was 2007, and you still looked at printed listings! I saw an open inspection on a house in our suburb that was on 810m2 – a large block – and no price. I was curious, so I went to have a look.
How to buy a house when you least expect it!
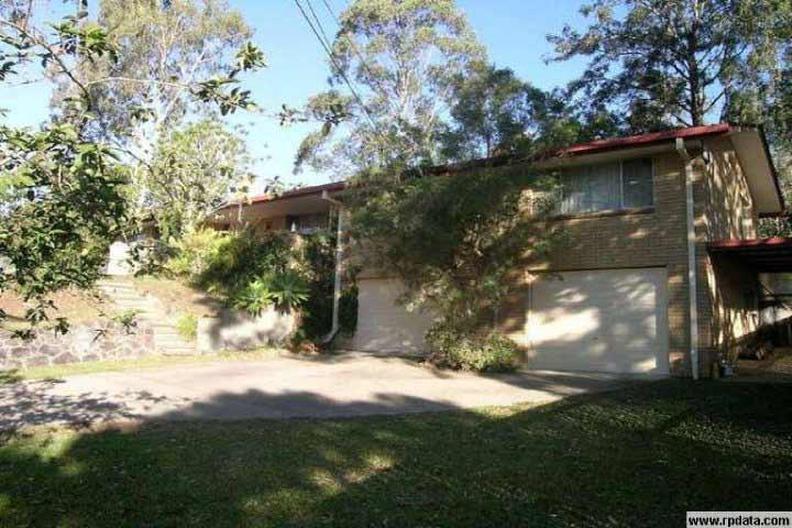
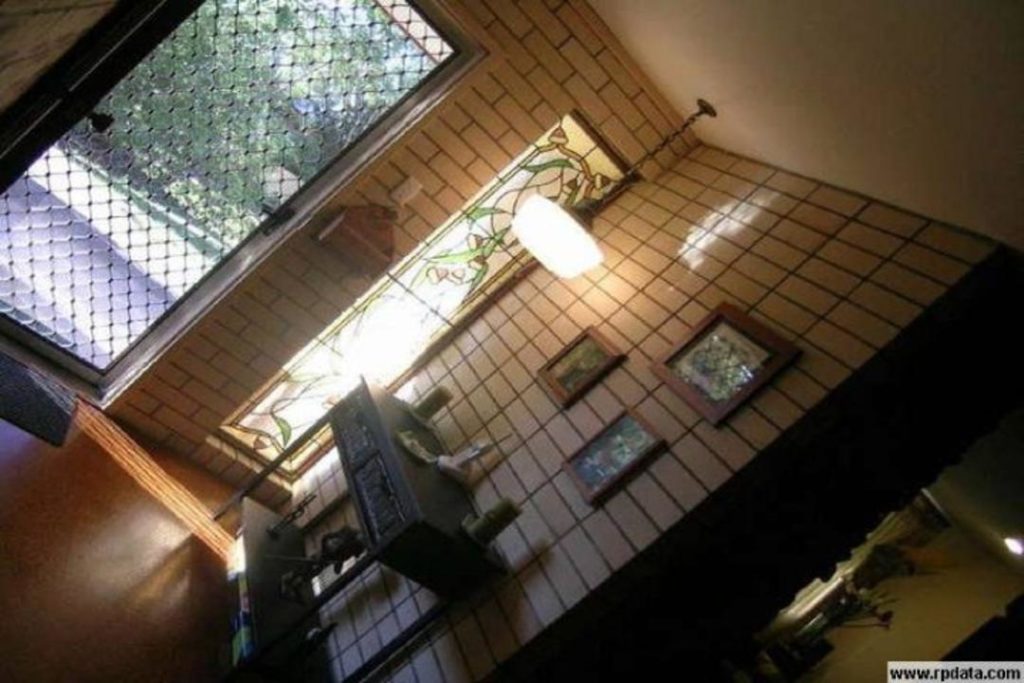
Twenty-four hours later, we’d made an offer on the place. It was a late 1960s brick home, with cork and carpet floors and every surface finished in an apricot colour (except where it was exposed brickwork). BUT it had great bones. It was located in a small cul-de-sac. The bulk of the yard, and the internal living areas, were to the north-east. The plan was simply laid out, with good size rooms, high ceilings, and there was an internal staircase to the downstairs garage. It just needed cracking open – internal walls removed in the living area and opening up to the garden, as well as a decent outdoor entertaining area, and modernising throughout.
Ooops! We still own a house we haven’t finished renovating
Thing is, we weren’t ready to sell our first home. So we offered a 3 month settlement (the home was empty), and increased our offer to match the rent the owner would have received for that time. It was accepted, and we madly worked to finish off our first home, get it on the market and sell it. Its first open was super-busy, we had a contract on it that night, and sold very happily at the price we knew it was worth. We had $290,000 in equity to head into this next project. Not bad, given that for most of the time we lived there, our combined income was around $60K per annum, and we’d bought it with $10,000 to our name.
The Plan
Our strategy with this reno was to:
- have our mortgage structured as a line of equity, geared to 80% of the property value (purchased at $455,000)
- both work part-time over the course of the renovation, using our line of equity to pay for the work, and also live off whilst we renovated
- do most of the work ourselves, and manage trades where required
Of course things don’t always go exactly according to plan. These are the 6 things I learnt from renovating our second home.
Lesson Number 1: Just pause for a moment and make a plan
We were so knackered from madly finishing off the reno of our first home with a 3 month deadline to complete, sell and settle, (and the general activity of the 4 years prior in renovating that home) that we decided to have a bit of a break until the new year before we started again. It gave us was time to see what the house was REALLY like to live in. How the sun moved. What parts were hot and cool at different times of the day.
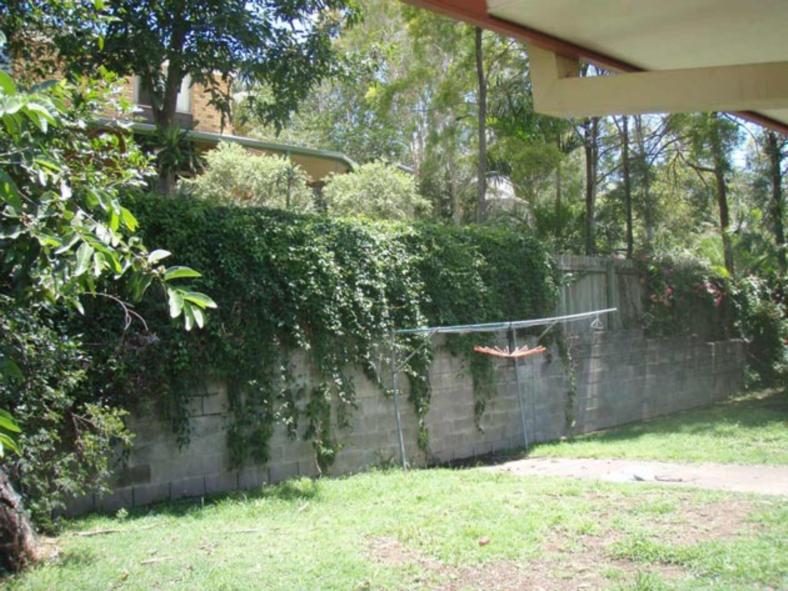
For us, it particularly changed what we did first. We hadn’t noticed the overlooking presence of the house behind during our inspections, which sat a few metres above us, and looked straight into the rear of our home. However, in living in the home, we felt their eyes on us all the time! So the first thing we did was paint the rear retaining wall/fence, and plant bamboo to get a privacy screen. We knew we had some time, and that’s all it needed.
Pausing for a moment, and learning a bit more about where you live before you change and improve it, is a worthwhile endeavour in determining where you will add the most value and create the best change to a home.

Lesson Number 2: Keep the quirk
One of the things I LOVED when I first inspected the home was the fireplace. In Brisbane, it’s unusual to find a home with an open fire – especially one built from polished pebbles and a brick hearth.
The fireplace had to stay. We cleaned all the pebbles and mortar and put a new coat of clear acrylic on it to enhance the shine. In a contemporary living room, the fireplace now looked fantastic as a feature, and celebrated it as something nobody takes the time to build or produce anymore. It also gave the room a focal point that wasn’t the television.
Finding old homes with original elements, and then restoring and improving those original elements as features to the new renovation, does pay dividends. Original ceilings, timberwork, or perhaps some stone tiles in the garden. It may be the smallest thing, but it helps the home tell a story that gives history, belonging and heart to the way it feels.
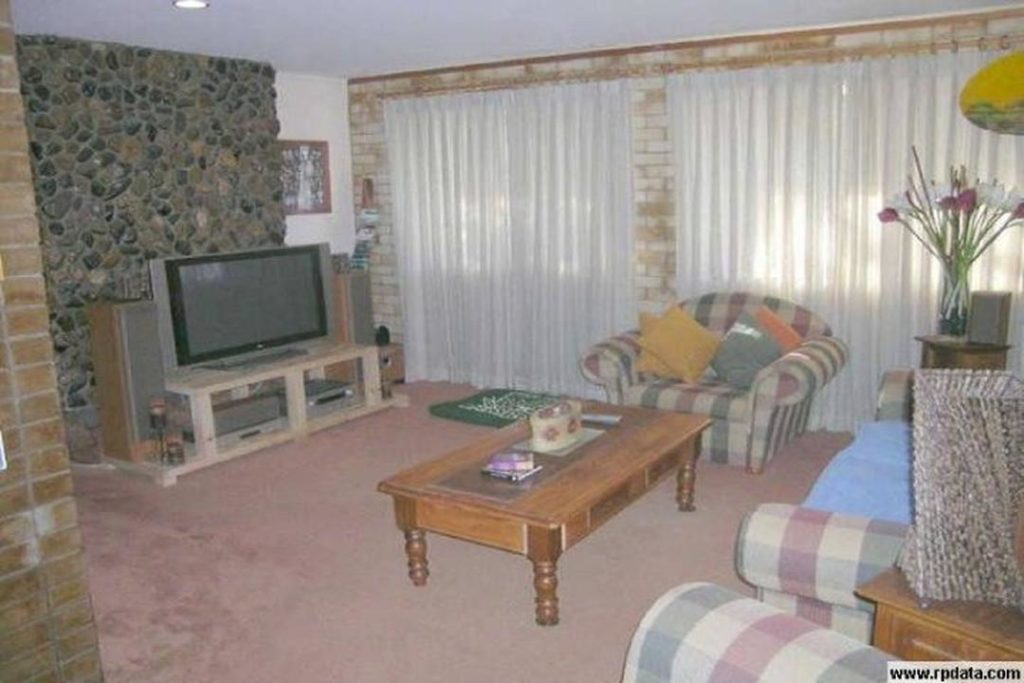
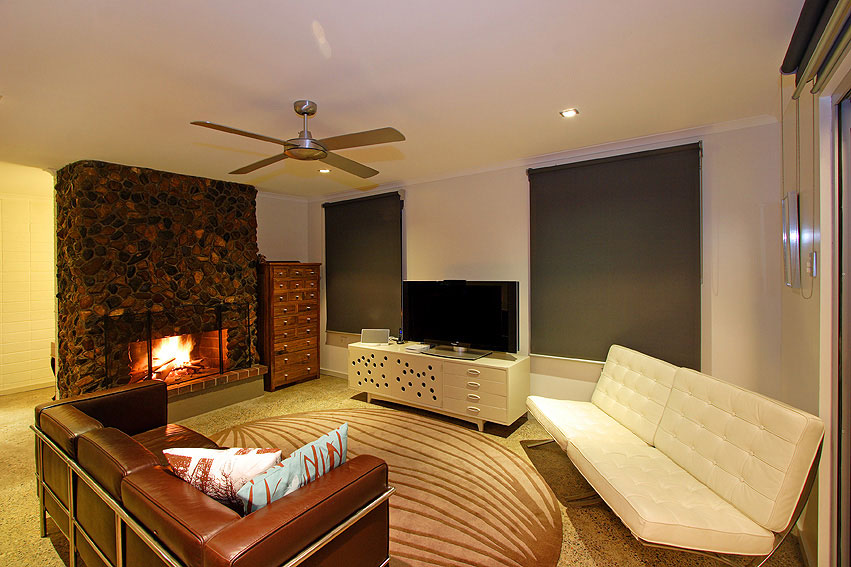
The finished living room and THAT fireplace!
Lesson Number 3: Tenacity pays everytime
Renovating can be relentless, especially when you’re living in the home. I’ve written before about how important it is to establish your goals for your renovation, and then keep perspective throughout the process by remembering them as you go.
Whilst we were part-way through our renovations, a big storm hit our area of Brisbane, and brought a tree down on our roof, which brought water through the roof and into the home. The areas it hit hadn’t been renovated yet.
Four days later, we had a torrential downpour, which flooded the renovated living room.
I was four months pregnant with our second child. The insurance assessor came and examined the damage and we were offered a settlement of around $20,000 for over $100,000 worth of damage. For the next 13 months, we battled them, then the organization that underwrites them, then with the ombudsmen. We proceeded with the repairs and renos ourselves – we only had one bedroom that was habitable.
It added an unexpected curve ball to our renovation progress. What I didn’t anticipate was the level of stress and emotional rollercoaster it would subject us to as well. We were finally awarded $110,000 by the ombudsman.
It taught me the key to our success was tenacity. Sheer staying power. When one of us wanted to give up (which happened plenty of times), the other kept us going. If you don’t have a partner helping you, find a support crew who can remind you of your goals and help you to keep going. At some point you’ll need it. Something unexpected, extreme or otherwise, will always turn up. Your goals are important and tenacity will get you the results you want. With all the renos I’ve been involved in – either my clients or my own – tenacity has been the winning ingredient.
Lesson Number 4: Gauge how people treat you
On my hubby’s days off, he worked on the house, and I did the design and documentation, selected finishes and fixtures, and organized trade quotes and purchases of materials, around my part-time work.
So, tradespeople would come to the house, and I would get them to quote what I’d designed and drawn up.
The thing was, I usually had a baby on my hip whilst I did this.
As an architect, at least I had some expert advantage that helped me in dealing with tradespeople. The thing was, with a baby on my hip, suddenly some of these tradespeople didn’t treat me like an architect – they treated me like the “little Mrs”. I got my first insight into what it felt like for my clients, and why they were so appreciative of having me in the mix to help them navigate their process.
Once or twice, we hired one of these guys. We were idiots. Even though it went against my intuition, we were on a budget and the price was right. This was a big mistake learnt the hard way.
The one thing consistent between the tradespeople that didn’t treat me with professional respect was that they did their job poorly. The other thing was that they would only listen to my husband give them feedback, and it never ended well. It cost us much more in stress and time than the savings were worth.
How people treat you is a gauge of how working with them will go. If they’re not respectful when they quote, and treat you kindly as the person who’ll be providing them with income (regardless of your level of expertise) … if you’re female and they’ll only talk with your husband … and if they’re dismissive of your curiosity and questions – then don’t bring them on board. It’s just not worth it.
Lesson Number 5: Invest where it matters and budget everywhere else
Part of the renovation work we did included gutting the brick walls in the living/kitchen/dining area and adding a new 4.5m wide opening to the eastern wall, which we put a big bifold door in. The door we added cost over $5,000 (our whole bathroom reno was cheaper than that, by comparison). We added a new outdoor room off that side of the home, and extended the existing roofline to create its cover.
We debated extensively over what kind of door opening to put in there. Sliders would have been much cheaper. Especially if we broke them up into a few openings with steel posts between. Having the bifold meant that we needed a very chunky piece of steel over as a lintel to hold the roof up.
It was an investment that was worth it. The impact it had on creating a strong indoor/outdoor connection, on expanding the volume of the interior space and dissolving its edge, and the amount of natural light it let in, was well worth the expense.
Conversely, most of the fixtures we bought for the bathrooms and kitchens were from discount plumbing suppliers. The robe fitouts were IKEA. The carpet was an end of roll run. The bathroom tiles were last stock of a line also. Most of the plants were culled from another garden, or bought very small early in the process so they had time to grow. We stockpiled when we saw a bargain, and planned ahead so we had the time to hunt around (or let plants grow).
It can be very easy, particularly when you’re creating your dream home, to get caught up in the ‘must-have’ experience of buying. Getting seduced and spending more than you budgeted or planned to. And more than you’ll get back on it, or it will really add to your life. Just a big bill at the end which adds its own stresses.
Functionality and durability do not necessarily cost more. A designer brand does not make something more beautiful. Plan and assess your purchases with a clear mind. Get help if you can’t and are likely to overspend – I expect you will know this from your experience with other purchases in your life!

Opening up the end of the house to create a strong indoor/outdoor connection and a fantastic outdoor room.
Lesson Number 6: Look for the gift
The storms, and the battle we had after, completely changed how we felt about the home. Psychologically, it meant we’d go into battle stations every time the sky darkened and rumbled. We’d been in the house when the original storm had hit – standing in the hallway with me holding our son, and wondering where was safe to stand. The rain was horizontal, the wind was so loud, water was pouring through the window heads and then the tree came down and more water came in.
We’d thought this home would be a 5 year project, and we’d planned to build in under and extend garaging out the front, and put a pool in.
After we got the insurance settlement, we started thinking about moving on. Approaching every impending storm like we were expecting the worst wasn’t a peaceful way to live.
It was 6 months later we put the house on the market, and we know now that we’d maximised the return we could get on that property. There was a cap in that market, and if we’d put the pool in and extension on, we would not have received a comparable return from those improvements.
We’ve had quite a few unexpected occurrences in our renovating experiences, and so have my clients. They generally uncover opportunities or solutions previously unseen. If something disastrous or challenging occurs, look for the gift. It will be there.
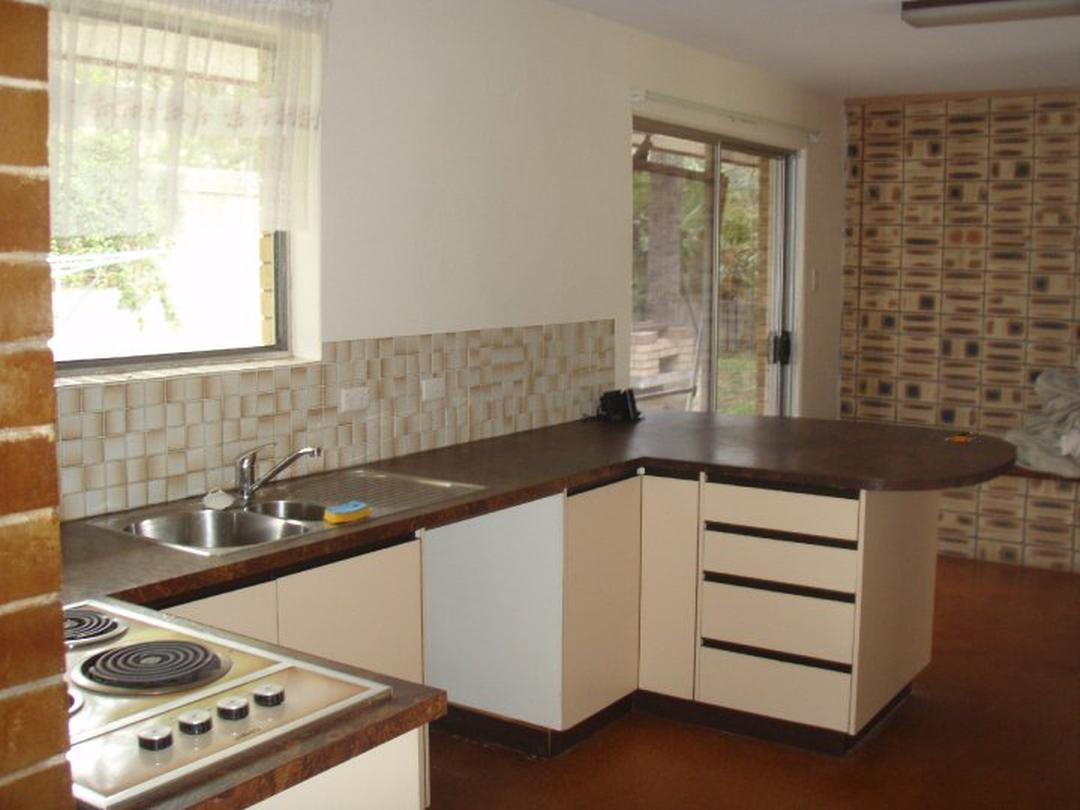
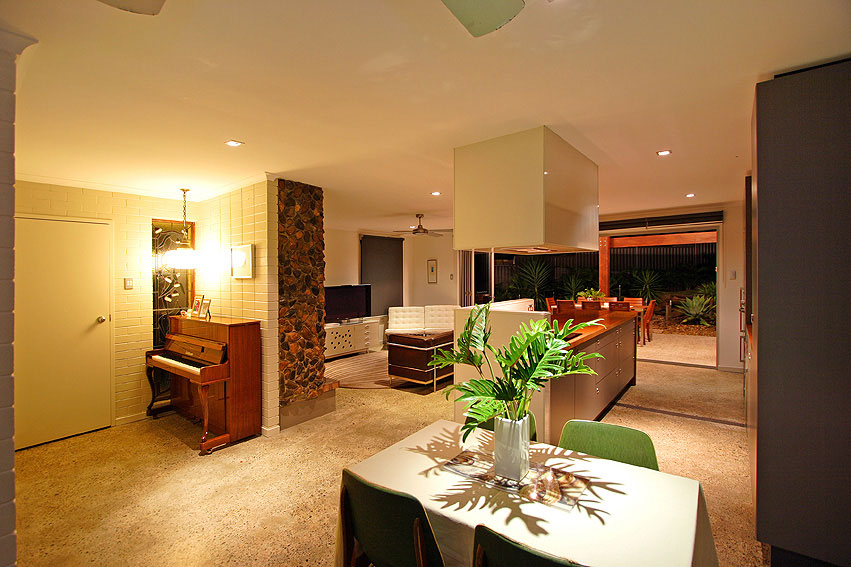
The open plan living/kitchen/dining area, opening up into the outdoor room and the garden to the north-east. Concrete floors under the cork were polished.
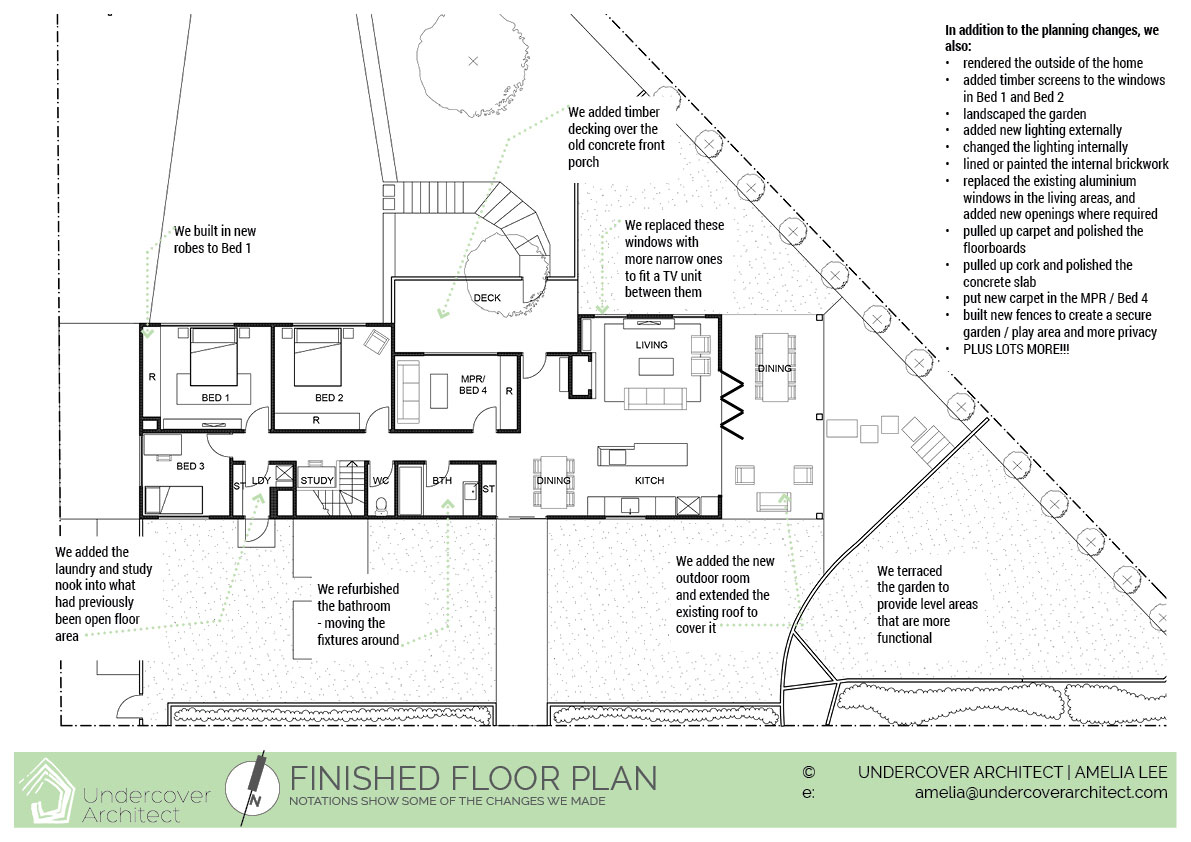
This is the floor plan we ended up with – with some notations about what changes were made. Click to enlarge.
So that’s my list of 6 things I learnt from renovating our second home.
(Amongst 5,001 other things, but that’s for another blog!)
This home was my favourite of our own projects. It wasn’t a massive renovation but it truly transformed the home into a great, functional and enjoyable place for a family to live. We didn’t have a big budget, and the bulk of the renovations we did were within the existing walls.
It took a really ugly duckling of a 1960s brick home, and reinvigorated it for contemporary life, and gave it a new story to tell. Ultimately, that’s what renovation is all about.
Other blogs you may find useful …
This one is great for helping you choose a builder
Not sure how many drawings you need for your project? Read this blog
Got a home with history and character you love? This one will help you with planning your renovation.
 With over 30 years industry experience, Amelia Lee founded Undercover Architect in 2014 as an award-winning online resource to help and teach you how to get it right when designing, building or renovating your home. You are the key to unlocking what’s possible for your home. Undercover Architect is your secret ally
the part about tenacity brought a tear to me eye. we’ve been in our 1950’s weatherboard for 8 years, after having had 2 kids instead of the planned renovation! recently we had the replastered, painted and organised the kitchen makeover. it’s made a big difference but there’s still a lot to do – ‘relentless’ is the perfect description for it. i’ll remember your tenacity comment. thanks sarah.
Hi Dione – thank you for your comment!
Yes, relentless is pretty much the ONLY word for it! I’m glad the the changes you’ve made are making a difference to your home and lifestyle, and hope that continued work on your home delivers the same results. Hang in there – it may be hard work, but I find it’s always worth it. Best wishes for your family,
– Amelia, UA x
I am so in love with 60s and 70s brick houses at the moment. Especially Those with raked ceilings with exposed beams and brickwork. Great reno and I’m glad you all made it out alive!
Hi Alix – thank you for your comment.
I’m with you … often the brick 1960s and 1970s homes are simpler to modernise with dramatic results, than the older timber homes. And yes, those with the raked ceilings certainly lend themselves to beautiful finished spaces too. We were so proud of the result we achieved here (and making it out alive too!)
– Amelia, UA x
Thank you for your blog! I have spent the afternoon reading this and several of your other blogs. They are so well written and full of such useful information.
I am looking into buying a 1960’s house to renovate much like you did with this property. I was wondering if it would be possible to see the original floor plan and the floor plan that you finished with? No problem if not 🙂
– Sarah
Hi Sarah,
Thanks so much for your kind words – I’m glad you’re finding the blog useful.
I know I have the final floorplan of this home somewhere digitally, but don’t think I have the existing anymore. I’ll have a look and post it here for you to see.
– Amelia, UA x
Investing where it matters and budgeting everywhere else is such a good tip! Great read, your renovation turned out just lovely. It can be so overwhelming & takes a lot of dedication and patience to get there in the end. I’d love to know about the concrete finish on the floor, were you able to grind the slab or is it a overlay product? Thanks! Fi
Hi Fiona,
I’m so glad you enjoyed that tip – it’s a good one to remember – and thank you for your kind words.
The concrete finish on the internal floor was the existing slab ground back. They used to put a lot more aggregate in standard house slabs in the 1960s! We were fortunate it turned out so well. We chose the same aggregate (Brisbane River) to do the exposed aggregate finish to the slab in the outdoor room, to tie them together, and then used loose Brisbane River gravel in the garden to keep the flow going.
For an overlay product, you can check out Pangaea Flooring … http://pangaeafloors.com.au/ … it’s a 10mm cement topping you can put over most floors and then grind back for a polished concrete finish.
Hope that helps!
– Amelia, UA x
Do you have a phone number I can contact you on to discuss using your services for us to renovate the external of our 1970s brick veneer home,
Regards Rob
Hi Rob,
Thanks for your question. It’s best to reach me via email. Just use the contact form on the website. CLICK HERE to get in touch.
– Amelia, UA
I am considering a renovation to a 1970s red-brick home. Mainly to address issues with natural light, making the kitchen bigger and adding a 4th bedroom with ensuite. A friend drew up a rough plan of the extended kitchen/4th bedroom/ensuite. I’m wondering if owner-building would be a good idea. Is this realistic given I don’t have a building background, but am a brilliant organiser?
Hi Carol
Thanks for your question.
The trick with being an owner-builder when you don’t have a building background, is that you may be a great organiser, but not really know what you’re organising. Someone ideally needs to check that the trades are fulfilling their work. It may serve you to be a project manager on your project, and keep a builder accountable (plus do the running around and bargain hunting for all the things going into your reno). Or, have someone you can call on to assist with site inspections etc to keep trades accountable if you are choosing Owner-Builder.
– Amelia, UA
Beautiful renovation. I agree with what you said “Each time you renovate, you learn something new!” Inspiring.
I found this blog after trying to figure out what to do with our 80s internal brick work.
Did you render or plasterboard the internal brick?
Did you opt for polished concrete on the floors? Was that the cheapest option?
Hi Natalie,
We painted some of the brickwork, and in other areas, we sheeted it with plasterboard.
We did polish the concrete. We found it underneath the cork and carpet, and so ground it back and put a clear finish on it. Given it was a 1960s slab, it had a high level of aggregate in it, and so came up well with approach. Hope that helps!
– Amelia, UA
Thank you so much for sharing your lessons and heartache. I really appreciated you sharing your experiences of not being treated respectfully by tradesmen. This I have found the most difficult challenge of renovating a home as a single woman. I could almost write a book! I think your lesson of only dealing with tradespeople who treat you respectfully is very important. I also have now learnt to trust my gut more and not expect that people will necessarily be honest and committed to doing a 100% professional job if they think they can get away with much less. Although I have had some positive experiences including a young tradesman who fixed a very difficult drainage issue these tradesmen were usually highly recommended by other women.Thank you again for raising this issue, it is something that should be addressed by all trades that regard themselves as professional.
Hey Kerry
Thanks for your comment.
I’m sorry that you’ve had a similar experience, and so glad you’ve been able to find some decent tradespeople along the way. Professionalism in the residential construction industry is something I’m really passionate about – as it will dramatically improve the experience for all involved.
– Amelia, UA